Showing posts with label Makeup.. Show all posts

Friday, August 12, 2011

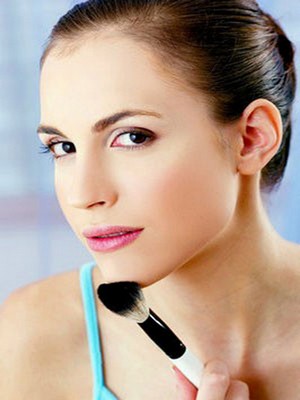
5 MINUTE MAKEOVER

Alright let's face it, most women want to be able to do their makeup quickly! A morning makeup makeover shouldn't take long to do. Stay at home moms, students, business women - who has time for makeup application that takes FOREVER?
Choose the right products, tools and techniques and you're ON YOUR WAY to lookin' GREAT! After all, if you don't look great, you don't feel great! See below, for some necessary product recommendations to make your daytime makeup application quick, easy and most importantly...CHEAP!

To pull off a 5 minute makeover in 5 minutes or less you need to have your makeup products organized and ready to go in the morning....if you have to search for them in your purse, makeup bag, etc...this takes away precious time.

Now here are my recommendations on how to achieve your 5 minute makeover:

1-Dual Perfection Pressed Powder:

Time required: 30secs

Quick and easy to apply with a powder brush yet gives you a fresh, flawless look and provides even coverage.


2- Pressed Blush:


Time required: 20secs

Use for both cheeks and eyes for a hint of color.


3-Mascara:

Time required: 60secs

Make your eyes pop by curling and thickening your lashes.


4- LIP GLOSS:

Time required: 30secs

Nothin' like a little color and shine combined!!

Tuesday, August 9, 2011

Blush tips..

 
Blush is probably the most overlooked makeup product there is. Blush gives your face a rosy, healthy glow. You can also use blush to contour facial features to enhance your cheekbones, elongate a round face, minimize a long face and highlight your best features. Most women skip this vital makeup step because they do not know exactly how to apply blush in the correct fashion. Use these blush application tips to help.

Makeup Tip, How to Apply Blush properly:

Blush should generally be applied directly on the cheekbones, and blended out and up towards the temple area. Never apply blush closer to the nose than the outer rim of your iris or below an imaginary line from nostril base to edge of face. Choose blusher colors that match your eye shadow and lip color or that have a slight reddish pinky color to them. Fair skin looks great in rose, olive in peach & dark skin in apricot or even red.

Contouring and highlighting with Blush to enhance your face shape:
Matching your blush application to your face shape ensures a perfect blush application every time..

Blush Application for an Oval Face: The perfect shaped face, needs little help from blush. But here's a few tips: For a natural look, apply blush onto the apples of your cheeks for a flushed, healthy glow.

Blush Application for a Square Face: Soften the angles of your cheeks by applying  the brighter color blush on the apples of the cheeks, then sweep the blush towards your temples. This causes the eye to look up, taking away from the sharp angles of a square face shape. You can also contour to round your jawline, by lightly dusting some blush from your chin to just below your ears.

Blush Application for a Round Face: Apply blush to the area above the apples of  your cheeks and blend slightly forward to thin the round face. Avoid getting the blush too close to your nose; this highlights the roundness of your cheeks.

Blush Application for a Long Face: To create the illusion of width on a long face, apply blush to the apples of the cheeks and extend the blush outward towards your ears. Next, sweep your blush across the middle of your forehead and along your chin line. This effect will shorten your long face.

Blusher Tips:

    Soften bright blush with loose face powder

    Always apply blush with a larger round brush. Don't use the small stick-like thing they give you in the compact.

    Your blush should match the rest of your makeup but specially the lip color.

    Never use blush on the underside of cheekbones.

    Select a color of blush that resembles the natural color of your cheeks after you exercise.
   
   Use blush on your temples and around jawline to contour your face. Be sure to blend well.


    Apply blush last,  after all other makeup

Friday, April 29, 2011

Summer Makeup

Summer makeup should not be heavy and is mostly aimed at protecting the skin from exposure to sun rays, avoid excessive sweating, cut out the oily shine and prevent clogging of skin pores that often result in acnes and pimples. Here are some tips to keep your skin healthy, make your makeup last longer and keep you looking fresh:

Avoid lip liner

Colors such as golden-green or mango green for eyes can be used along with black or brown mascara. 

Dewy face with the lightest veil of translucent powder is the right summer look. 


Dry hair frizz a lot as humidity increases and make curly hair unmanageable. Rich deep conditioning of your hair will help to tame your hair and don't forget to protect them from sun, sand and wind by wearing a trendy summer hat or a baseball cap. Wax and texturizers also help to tame frizzy hair. 


 Gold shimmer under brows or across cheekbones can be a luxury you can use.


In case, you haven't taken the precaution already and the damage is already done, use a foundation with the shade of your tanned skin to cover the area under your eyes and blend it well with the rest of the face. Then use nude or light brown eye shadow to give them a natural look. 


Light shade of bronzer on cheekbones and chin gives you a beautiful suntan. 


Sprinkle your feet with foot powder before wearing sandals to avoid any blisters. If you still feel shoe-on-skin rubbing, protect the sensitive area with a bandage before the blister forms. To get rid of the blister, take a clean needle and sanitize it with alcohol. Pop the blister and use cotton to clean any fluid that comes out of it. Apply an antibiotic ointment without trying to scrape off the skin and then cover the area with a bandage.


Sunglasses protect your eyes but do not stop the sun from tanning the rest of your face, resulting in eyes with paler skin around it than the rest of the face. To avoid this, generously rub sunscreen with SPF 30 with a broad spectrum over your entire face and body every two hours. 


 The sheer pastel, beige and pink nail polish acquires a yellowish tint after being exposed to sun for two days or more. To avoid this, use a clear nail gloss with inbuilt UV protection topcoat and do not forget to rub sunscreen on nails too after every two hours, just like the rest of your body.


Use eyeliner pencil of slate gray, warm chocolate or navy shades with a light hand.


Use gel on your hair and use only the fresh razor with triple blades to shave bikini line to avoid any unsightly rashes. You can use 1% hydrocortisone cream to any rash to cure it and hide any redness in the area by using tinted facial moisturizer. 


Warm blond and naturally medium brown hair with highlights may acquire coppery shades in sun due to oxidation. Thus, always wear a hat or scarf while venturing outdoors. Hair color gloss can help you to achieve the shine again. 


Warm, sunny, bright blush can be used. Wear only natural nude shades as lip colors while going out to the beach. If you cannot resist the temptation of using liquid lipstick while on the honeymoon in a tropical island, keep it inside the cooler for your soda or carry it in a pot or tube with a wand. If your bullet is going soft, try to cool it a little by placing it in a fridge or near an air conditioner.


Thursday, March 31, 2011

How to Keep Your Summer Makeup Fresh


Summer makeup should not be heavy and is mostly aimed at protecting the skin from exposure to sun rays, avoid excessive sweating, cut out the oily shine and prevent clogging of skin pores that often result in acnes and pimples. Here are some tips to keep your skin healthy, make your makeup last longer and keep you looking fresh:


       * Skip the foundation, if possible, and opt for a tinted moisturizer. If foundation is necessary, limit application to the center of the face, steering clear of the hairline.
       
       * Consider switching to an oil-free formula during the summer months or dilute your everyday foundation with an oil-free moisturizer. This lighter coverage will fare better when temperatures heat up.
       
       * Dust any coverage with a little loose powder. Use blush sparingly, letting your sun-kissed cheeks grab the attention.
       
      *  Blot any perspiration or oil buildup with non-powdered blotting papers. Or substitute a clean tissue, pressing gently into moist areas.
       
       * Remove under-eye foundation or powder buildup with a clean cotton swab. Resist the temptation to reapply unless you feel it absolutely necessary.
       
       * Reapply loose powder only. Pressed powder has the tendency to cake and clump when hit with moisture.

Tuesday, February 1, 2011

Mineral Makeup


Mineral makeup is actually made from mineral elements from the earth's minerals. It contains a combination of ingredients such as zinc oxide, titanium dioxide, bismuth oxy chloride, iron oxides and others. These minerals are mixed with other inorganic pigments to get the right color.
Mineral makeup do not contain artificial fragrances, colors and preservatives. These ingredients are some of the causes of allergies in many people. They also can be irritating to the skin. It is all-natural and being touted as something that can actually help your skin. It's called mineral makeup.
 
The benefits of mineral makeup cosmetics:
 * Natural look and feel.
   
* Stays on all day long.
   
* Good for sensitive skin. 

* It's anti-inflammatory and No harmful ingredients.
Mineral makeup is a great alternative for chemical makeup. Using pure natural mineral makeup every time will make a huge difference to your skin. so if you use makeup, make sure it is mineral makeup

Makeup Tips For Dark Skin


If you have dark skin then you should try this makeup for better look.

    * Foundation and face powder color in tan, sun bronze and peach may be tried. This shades will suit more dark skins.
  
  * Powder - Do not apply too much powder. Also, be sure to blend your makeup so there are no obvious lines.
 
   * Eye Shadow - You'll look best in forest green, medium purple, deep plum, medium blue, slate blue or gunmetal gray shades of eye shadow. Choose one shade only to use at a time and apply it all over eyes, from lash-line to brows.
   
* Eyeliner - dark, thick eyeliner will make you look overdone and will ruin the rest of your makeup.
   
* Mascara - Apply one coat of brown/black or black mascara.
   
* Lipstick - You shine in sheer lip glosses in shades of light brown, bronze or raisin red. The shades should not be too dark or too light. Medium dull shades would look best.
   
* Blush - Peachiest color blushers work best on dark and dusky complexion, your blusher is not be too pinkish.

Sunday, January 30, 2011

Prom Makeup Tips

 
Prom night is near and what better way to celebrate Spring than a formal dinner and dance with a stunning, flirty dress? Whether you have a date or you're going solo, prom is your night to glow with your own glamour and unique style.

You don't want to look ordinary, so try out some new makeup in the days leading up to your prom. There's some fantastic new eye-shadows and lip colors available with the staying power you will need for a long, fun-packed evening.


    * For a very dramatic look, try some shimmer on the face and eye. Use Flash powder to add shimmer.
    

* Trying out a celebrity's look is a great idea for prom because changes are a professional makeup artist perfected the look just so you can copy it.
 

   * For better pictures, use loose translucent powder on your face to cut down on your "shine" factor. Take along a compact of pressed powder for some quick touch-ups. You'll have those prom pictures for years, so don't forget these 3 things: apply liner & lipstick with a mirror before you pose and powder your oily areas.
  

  * Select a foundation that is one shade lighter than your own, and gently place around the eye area or any other area with deepening lines. This is important, because you don't want your regular foundation welling in those lines, looking darker, and emphasizing the lines you're attempting to hide. You, too, can be picture perfect if you select the correct makeup.
  

  * Add some shimmer powder on the high points of the face.
  

  * Use three complimenting colors on the eyes and blend, blend, blend.
 

   * Using a lip pencil (not too dark), draw just outside your natural lip line. Then, fill in with the color of your choice all the way to the lip's edge. Now, place a little shade of white glimmer stick right in the center of each lip, top and bottom.
   

* If you want to play up your eyes, go all out with liner, shadow, mascara & even false eyelashes

Friday, January 28, 2011

Party Makeup


Everybody in this world wants to look beautiful. This desire becomes more prominent especially if there is some special occasion or party. Researches say that a nice make up boosts up the confidence of a person in the social arena. So, not only on physical level, the art of make up has it charm on psychological level also. Apart from this, who does not love being the center of attention in a party? In case you are scheduled to attend some party recently, go through this article to discover some handy tips on part makeup.


How is Party Makeup different from Regular Makeup?


Party Makeup is very different from the makeup we apply on a regular basis. As most of the parties are scheduled on evening or night time, the party make up is obviously more glittery and shining than the regular make up. It is also comparatively darker and dazzling than the regular makeup. Apart from the clean, clear and attractive look, the party makeup aspires to provide a poised and jaw drop gorgeous look. 


Before you choose a Party Makeup


*It is very important for you to keep certain points in mind before you go for a party make up.


*Go for a makeup that suits the mood of the party.


*Choose the makeup complementing your skin tone.


*Try to look gorgeous without experimenting much with your comfort level.


*Go with a makeup that suits your persona.


*If you are planning to do something new, go for a trial first to avoid any haphazard at the last moment.


*Try doing something different from what is in extreme fashion to avoid being a commoner.


*Feel confident of whatever you get done with yourself and carry it well.


Tips for Party Makeup


*Go for proper cleansing, exfoliating, toning and moisturizing before anything else.


*Apply ice all over your face.


*Now thoroughly apply concealer in order to hide the scars and imperfections on your face.


*You should then apply light base and foundation on your face and neck to make your skin smooth and even. This also helps to avoid sweating which can spoil your makeup.


*You should now apply a highlighted oil-free moisturizer mixed with shining products such as shimmer dust to provide extra shine to your face. Remember to set loose powder by even brushing on the face and neck.


*You can experiment with eye makeup according to party wear you are planning to wear. However, Smokey eyes are always a good option for a sexy and sensual look in parties.


*Choose your lipstick in accordance with your dress. However go for darker shades if it is a night party.


*Golden, bronze and silver liners add to your freshness and glamour. So prefer using them.


*In case the party is a little formal or a day time party, go for a little lighter make up and less shimmering dresses.

Monday, January 24, 2011

Casual Makeup


Every girl wants to look her best while going out of the house. But, going to college or a friendly gathering doesn’t have to be a tedious affair early in the morning. It's best you put on some casual makeup to highlight your features and leave the rest to the natural beauty within you. Also, who turns up to a workplace too bright or jazzy? Usually, casual makeup is applied on a casual day out, a day with the girls, a casual date or simply when you are sitting at home waiting for that someone special to turn up.
A very misconceived notion is that wearing lots of makeup makes you look good but the fact is, it’s all in the technique. Beauty lies in the eyes but the trick is to guide the eyes to your best features. With casual makeup you do just that – appear simple yet beautiful, which is exactly how a woman should be. But, it may not as simple to carry this makeup off with style unless you read a few tips. 

They are as listed below.

Casual Makeup Tips

  • The basic tip that holds for any makeup is: to cleanse, tone and moisturize.

  • Wash your face before you start putting on any makeup. Pat-dry your face with a towel so that no excess water remains.
  • Now, since it is casual makeup, apply a light skin colour powder foundation. This evens out the blemishes on the skin. Brush the powder in circular motions on your face. Don’t forget the neck too! Bronzers look great on slightly darker skin. Skip foundation if you’re using concealing powder. Too many layers will make the makeup look thicker.
  • Colour choices for lipstick must be light. Pinks, lavenders, light browns, nude and orange! These can be either a glossy or a matt finish. Lip liners shouldn’t stand out too much from the lips, so it must be in the lip colour applied. There is no harm in using some shimmer with those lips.
  • Nude makeup is how casual makeup should be. So try and avoid colours such as reds, deep purples, dark browns or magenta. You might end up looking too dressed up for a casual occasion.
  • You must use eyeshadow very carefully. Choose neutral colours such as peach, light pink, light brown or something that matches your skin tone. This highlights the eyes in a way that you won’t know! Apply in circular motions so that it gets evenly spread. To add a dash of colour, you could shine up the crease of the eyes with a colour of your choice but nothing too contrasting.
  • Apply single coats of mascara to give that extra sleek finish to your eyes. Overdoing your lashes will make you look too plastic. But, it is still important for you to wear mascara as your eyes will pop immediately! Curling you lashing once isn’t such a bad idea either.
  • For the cheeks, use some nice and cute pinks/browns. If you have a darker skin complexion, use brown and for a fairer one, use pink very scarcely as it would appear more obvious on your skin. Use large brushes or cotton pads to spread the colour evenly so that the sun/ weather don’t affect the makeup by caking up.
Using some of these tips for a perfect day out or a somber occasion will make your natural beauty show and you will glow amongst the crowd. Just remember to complement your makeup with the dress you are sporting. Bright coloured clothes go best with nude makeup. Also, never leave the house without looking at the mirror for that last complete look before you face the world. And don’t forget to tell yourself how gorgeous you are!

Sunday, January 23, 2011

Make-up Brushes..


Choosing The Make-Up Brush Sets That are Right For You
The make-up brush sets you have should contain the right set of tools. This is essential to good make-up application and great looks because it really makes applying make-up so much easier.

A professional collection of different-sized brushes allows you to apply eye and lip colors more easily and blend them in smoother.

And, did you know that using the right sponge helps to smooth on foundation more easily and evenly?!

So making a small investment in a few good, affordable, natural-bristle make-up brush sets is indispensable.

Taking Care of your Make-up Brush Sets...

To keep the brush applicators in your make-up brush sets helping you look good for a very long time it's a good idea to take good care of them. They would love to be stored neatly in a makeup box, maybe even a special tool box of their own. Don't leave your cosmetic brush unattended in your powder room. You never know what they might get into! Good faithful brushes, stored properly, can spend their useful lifetime with you!

While looking for a few good brushes for your make-up brush sets, you should try them before taking them home. A brush with soft bristles works best for soft looks, but it can't be too soft or it won't pick up the color. Now, if it's too hard, it will feel scratchy and it may even irritate your skin. Avoid cheap discount brushes.

Which Brushes to Have in your Make-up Brush Sets?...

Retractable Powder Brush
 

This is one of the largest brushes in your make-up brush sets and it's used to apply loose face or bronzing powder (mineral powder) evenly. Use the same brush to dust off the excess powder from your face (same size as kabuki brush except with a handle).

Round Powder Brush
 

Same as above except for the rounded handle and fan style bristles which allows for a wider single application.

Eyebrow Brush / Eyelash Comb (Lash Separator)icon
This two-tools-in-one is the one to use for brushing eyebrows up and outwards to give definition to your eyebrow. Use the eyelash comb to separate eyelashes and for combing out excess mascara from your eyelashes after it dries to prevent clogging.

Angled Eyebrow Brush
 

Sometimes this brush is used in combination with an eyebrow pencil to darken your eyebrows or to fill in spaces where the hair growth may be uneven. Choose sable hair for fine eyebrows are and hog hair for coarse eyebrow hair.

Mascara Wand
 

Use the mascara wand (included with mascara set) to apply your mascara. When needed, comb through your lashes using the eyelash comb to remove excess mascara and give your lashes and even look. A must for make-up brush sets.

Dome-Shaped Eye Shadow Brush


This type of brush's hair is graduated from short to long in a rounded, dome shape (eye crease brush). You should use a different brush per different application (example; one to shade, another to highlight). The neat thing about this brush is that, because of it's rounded cut, the shadow clings to the brush in such a way that is allows the particles of shadow to be distributed evenly across the eyelid. They are available in different sizes. Another must for your make-up brush sets.

Flat Eye Shadow Brush
 

This brush (eye definer) is used to blend in the color only and should not be dipped into the powder, shadow or blusher at all. This type isn't as good for applying powder or eye shadow since it doesn't allow the color to be distributed gradually.

Smudge Brush
 

This is the perfect brush for applying eyeshadow close to the lash line for a smoky lined eye. An ideal brush to smudge or soften pencil lines or to place powder over pencil for added depth and wearability.

Blusher Blending Brush
 

Can be larger than your blusher brush (cheek brush) and the hair can be either rounded or straight cut. Use this brush to soften the edges after applying blusher. And never dip it into your blusher container, this brush is strictly for blending the blusher on your face.

Retractable Lip Brush
 

Must definitely be a small firm-tipped brush (lip color brush) to ensure a perfect lip line and give you greater control over applying lip color. Of course, you could still achieve a clean lip line by carefully using an average-sized brush. A must for make-up brush sets.

Foundation Sponge
 

Sponges allow you to get into creases easier and they help avoid streaks when applying liquid foundation because sponges apply cake powder lightly and evenly. They need to be replaced when they look shiny because they pick up oils on your face. Latex sponges are available in a variety of shapes and forms. Keep sponges clean by washing them once a week. Sponges are an important addition to make-up brush sets (good for applying concealer).

Makeup Brush Set
 

This kit ontains a collection of seven best-selling professional wood-handle makeup brushes including:

    * Eyebrow brush
    * Eyeliner brush
    * Eye shadow brush
    * Eye crease brush
    * Blusher blending brush
    * Blush brush
    * Lip brush

Related Posts Plugin for WordPress, Blogger...